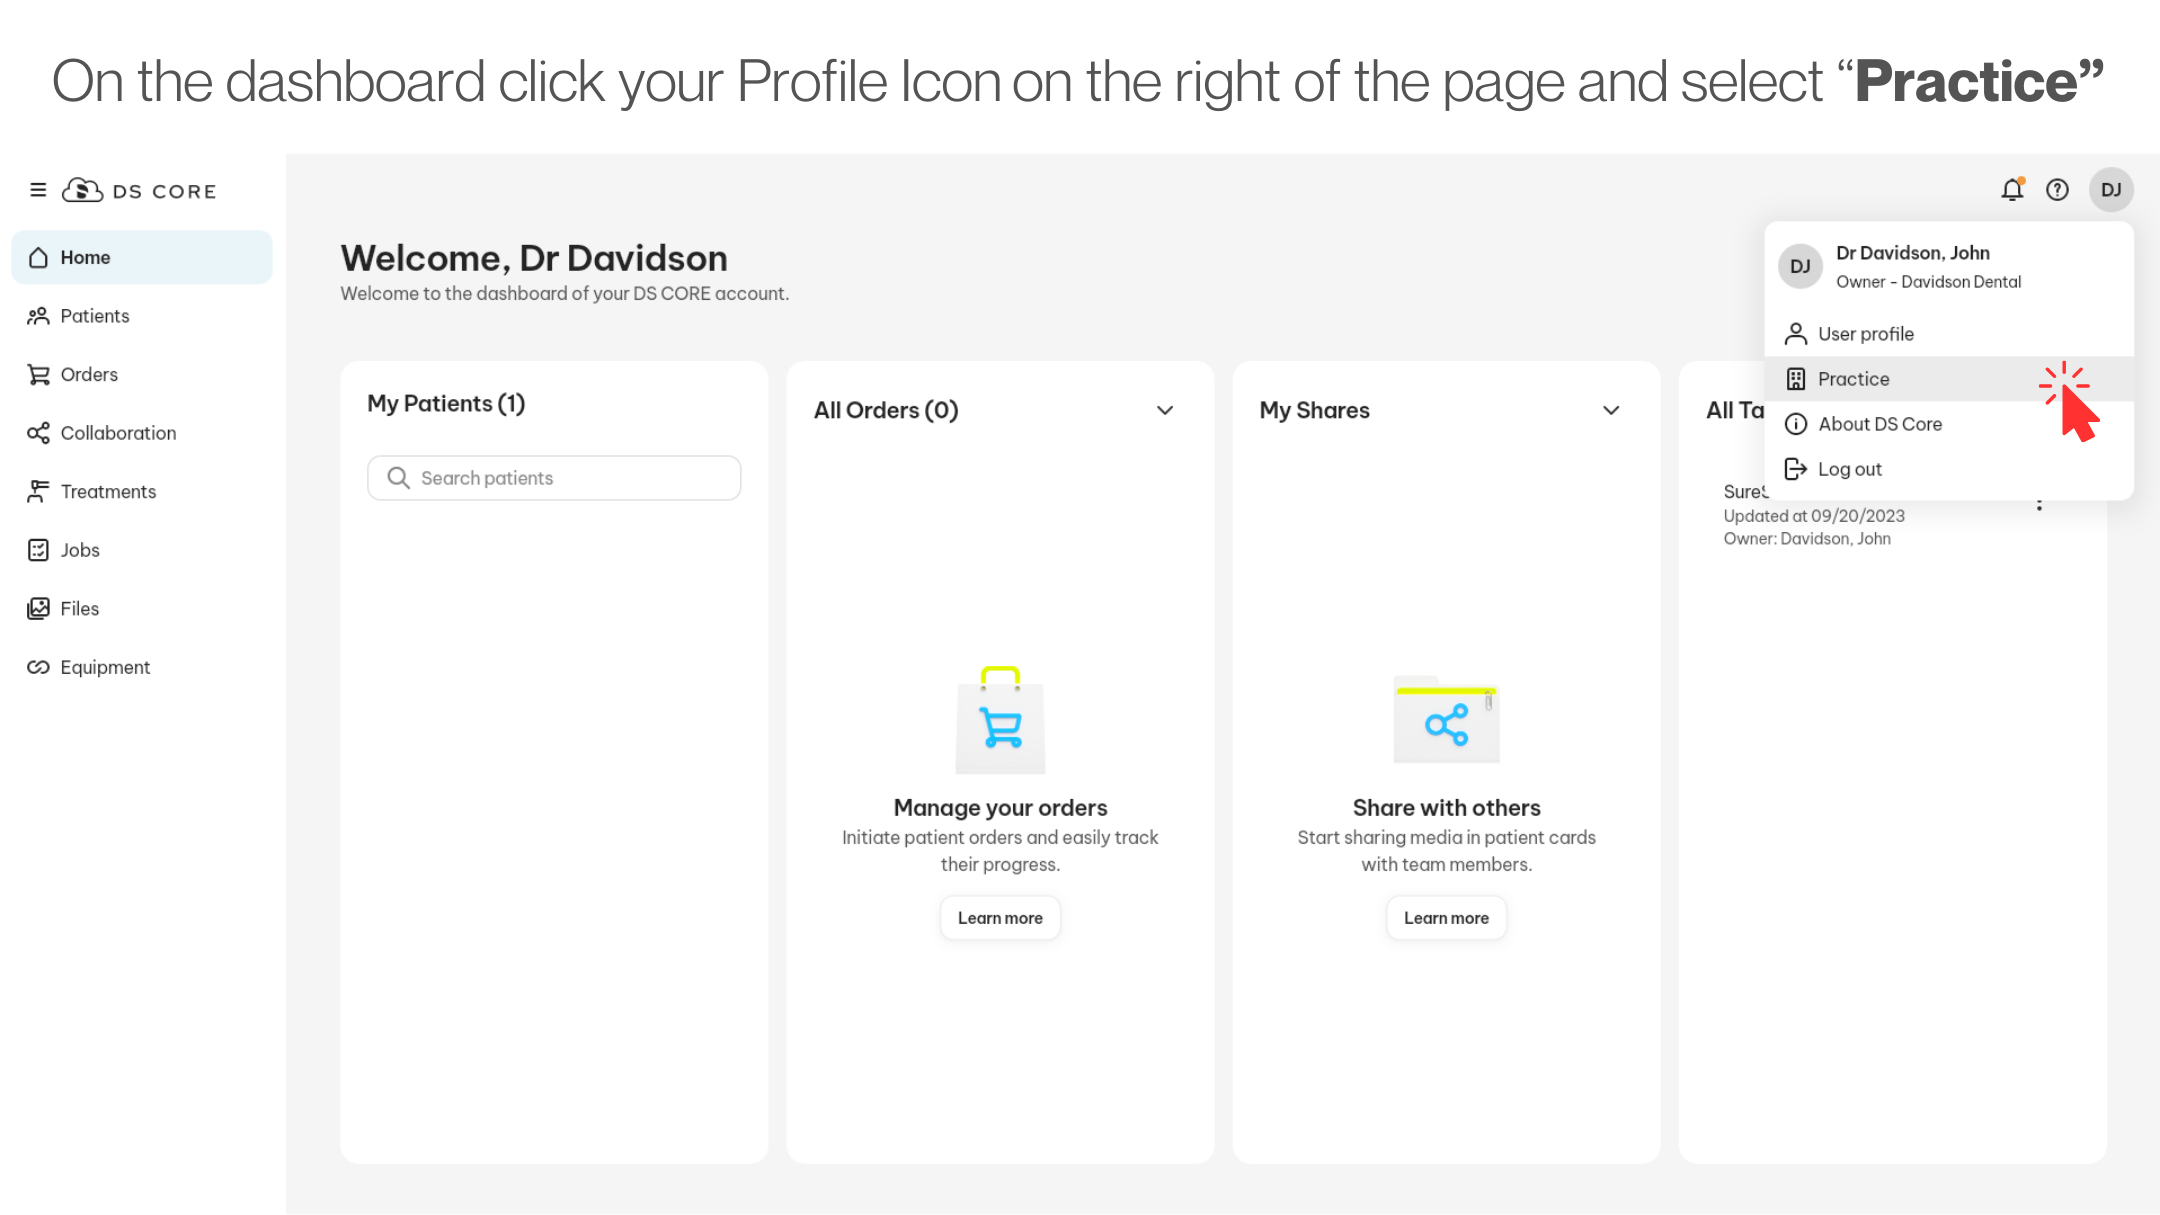
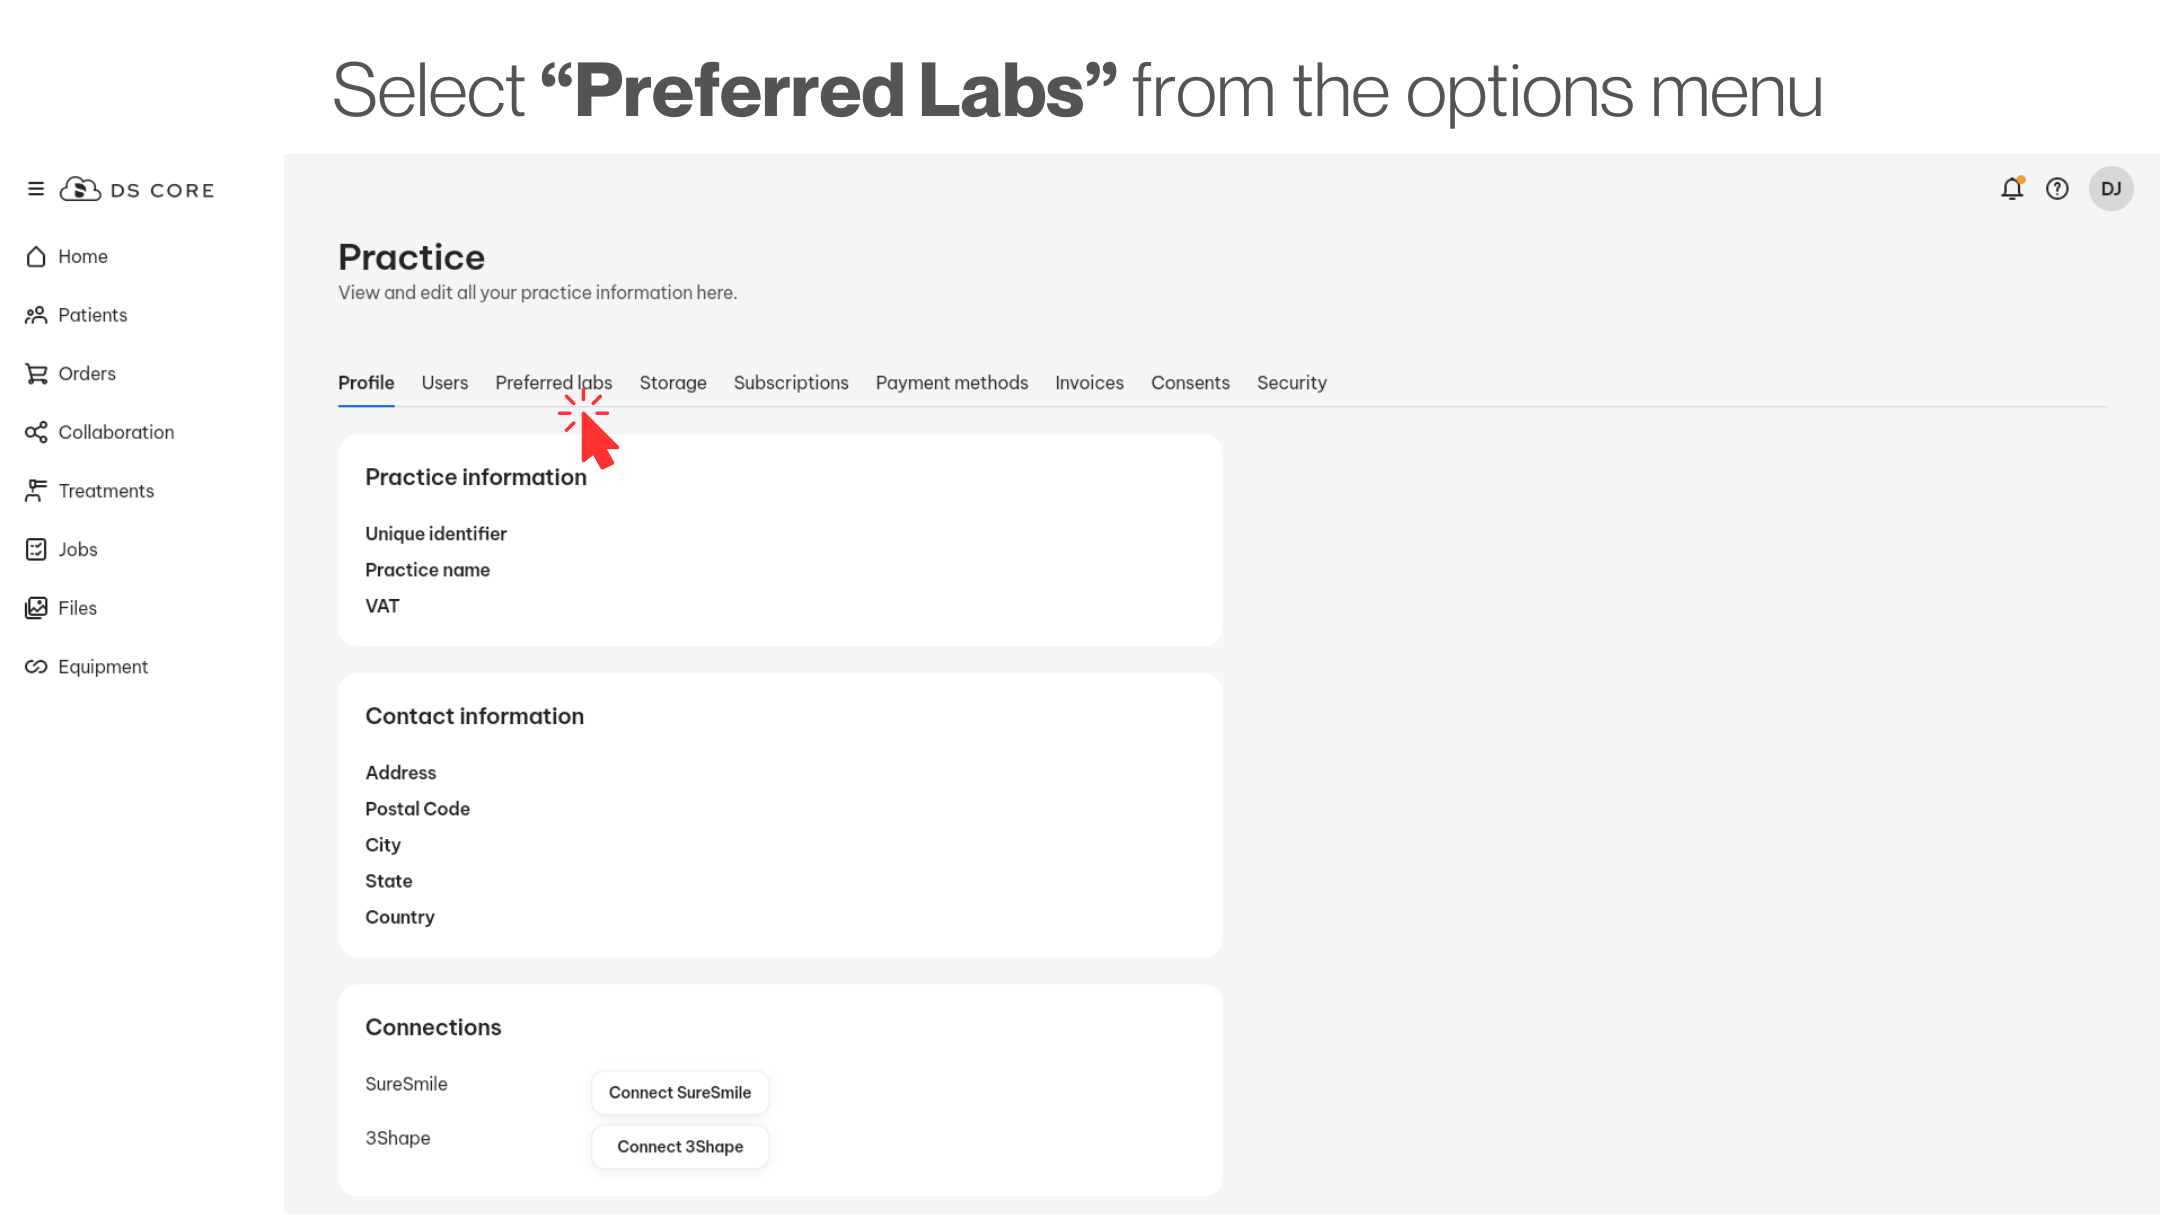
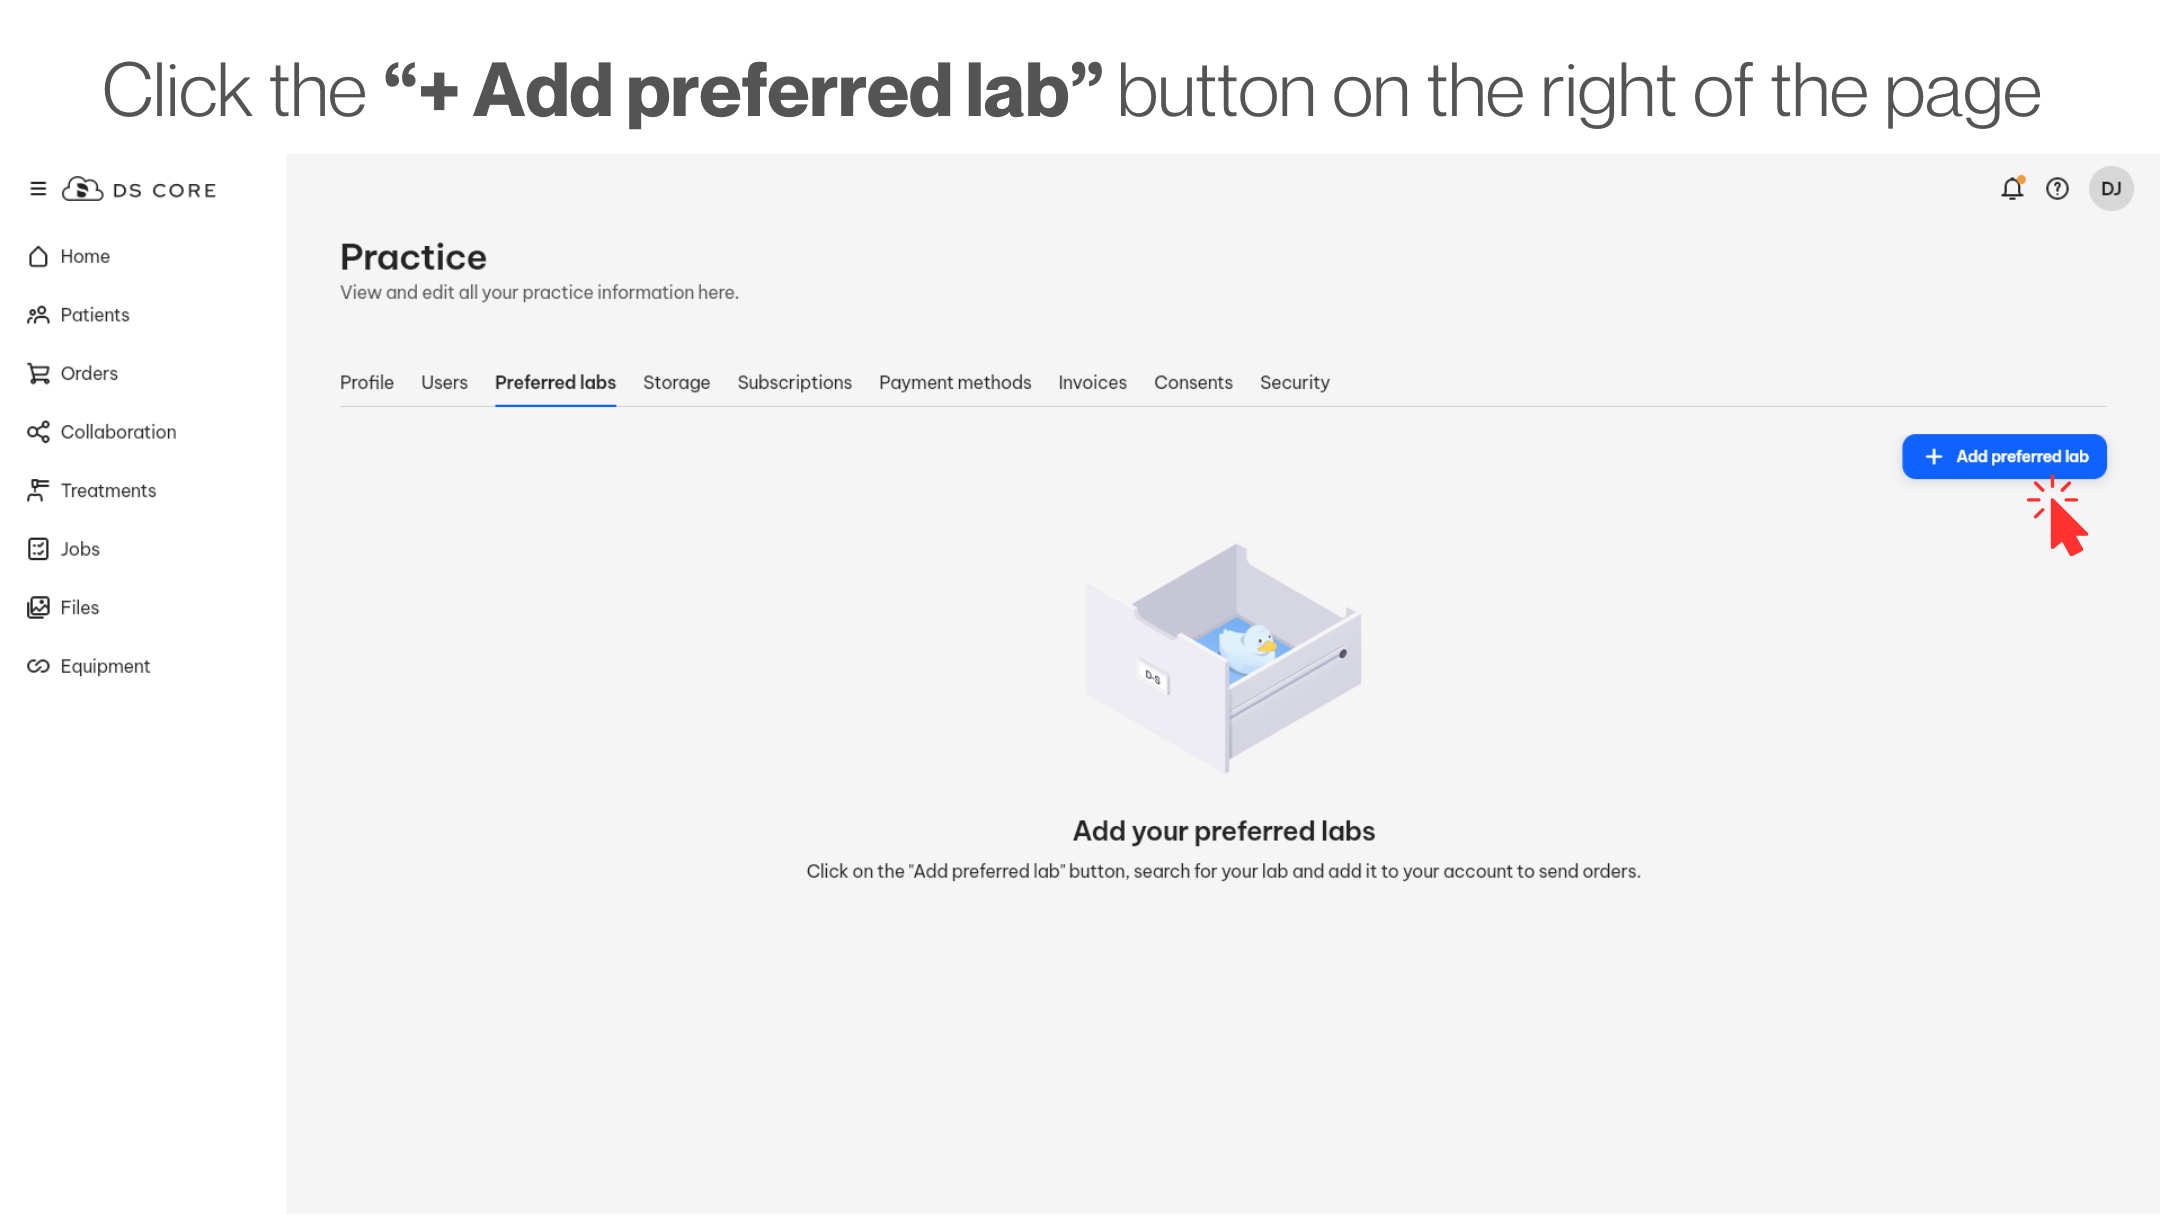
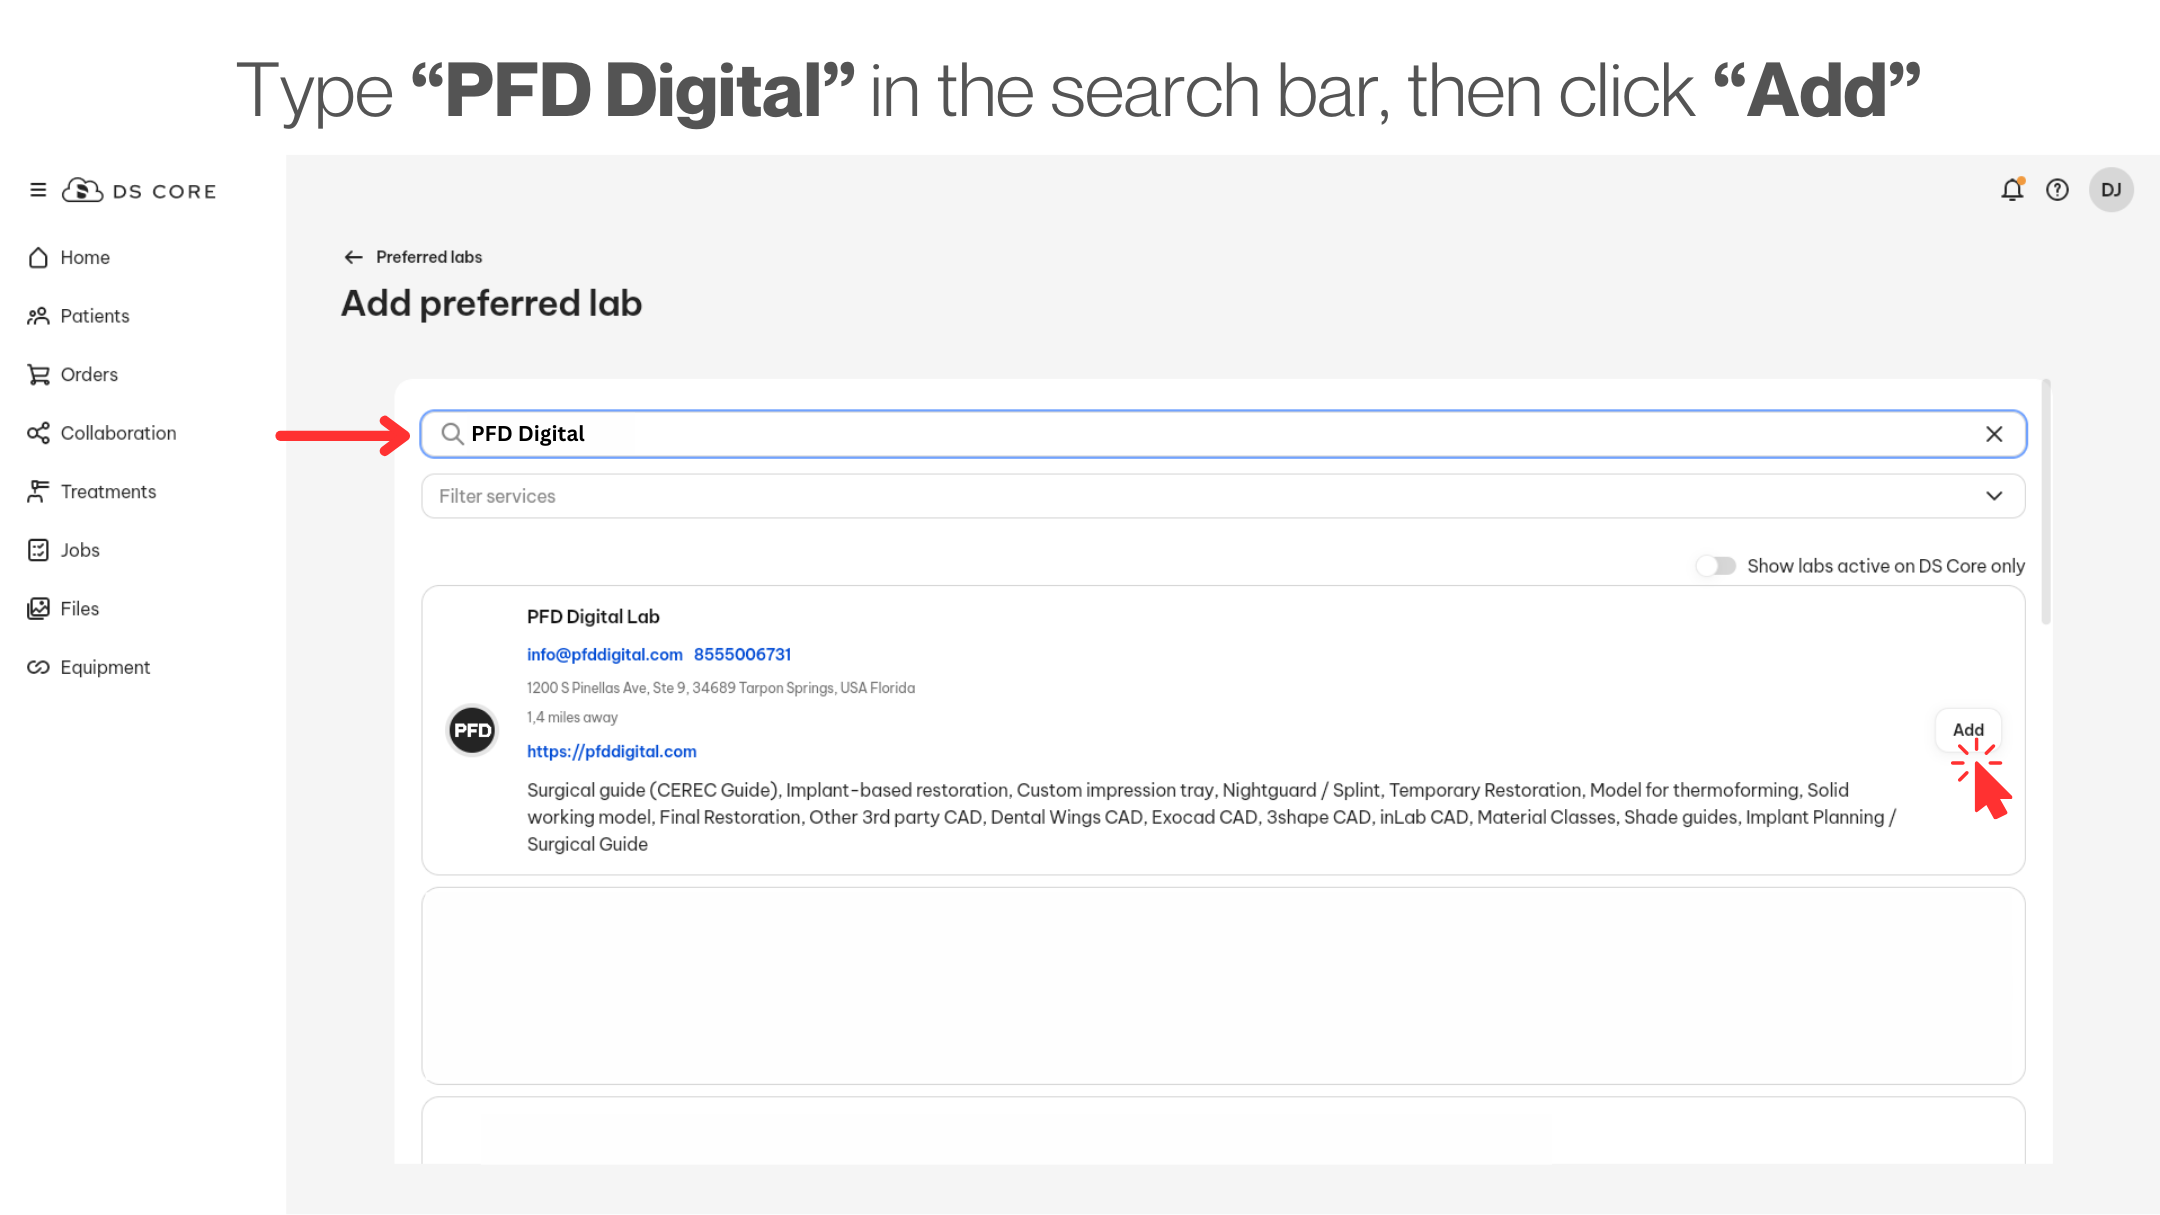
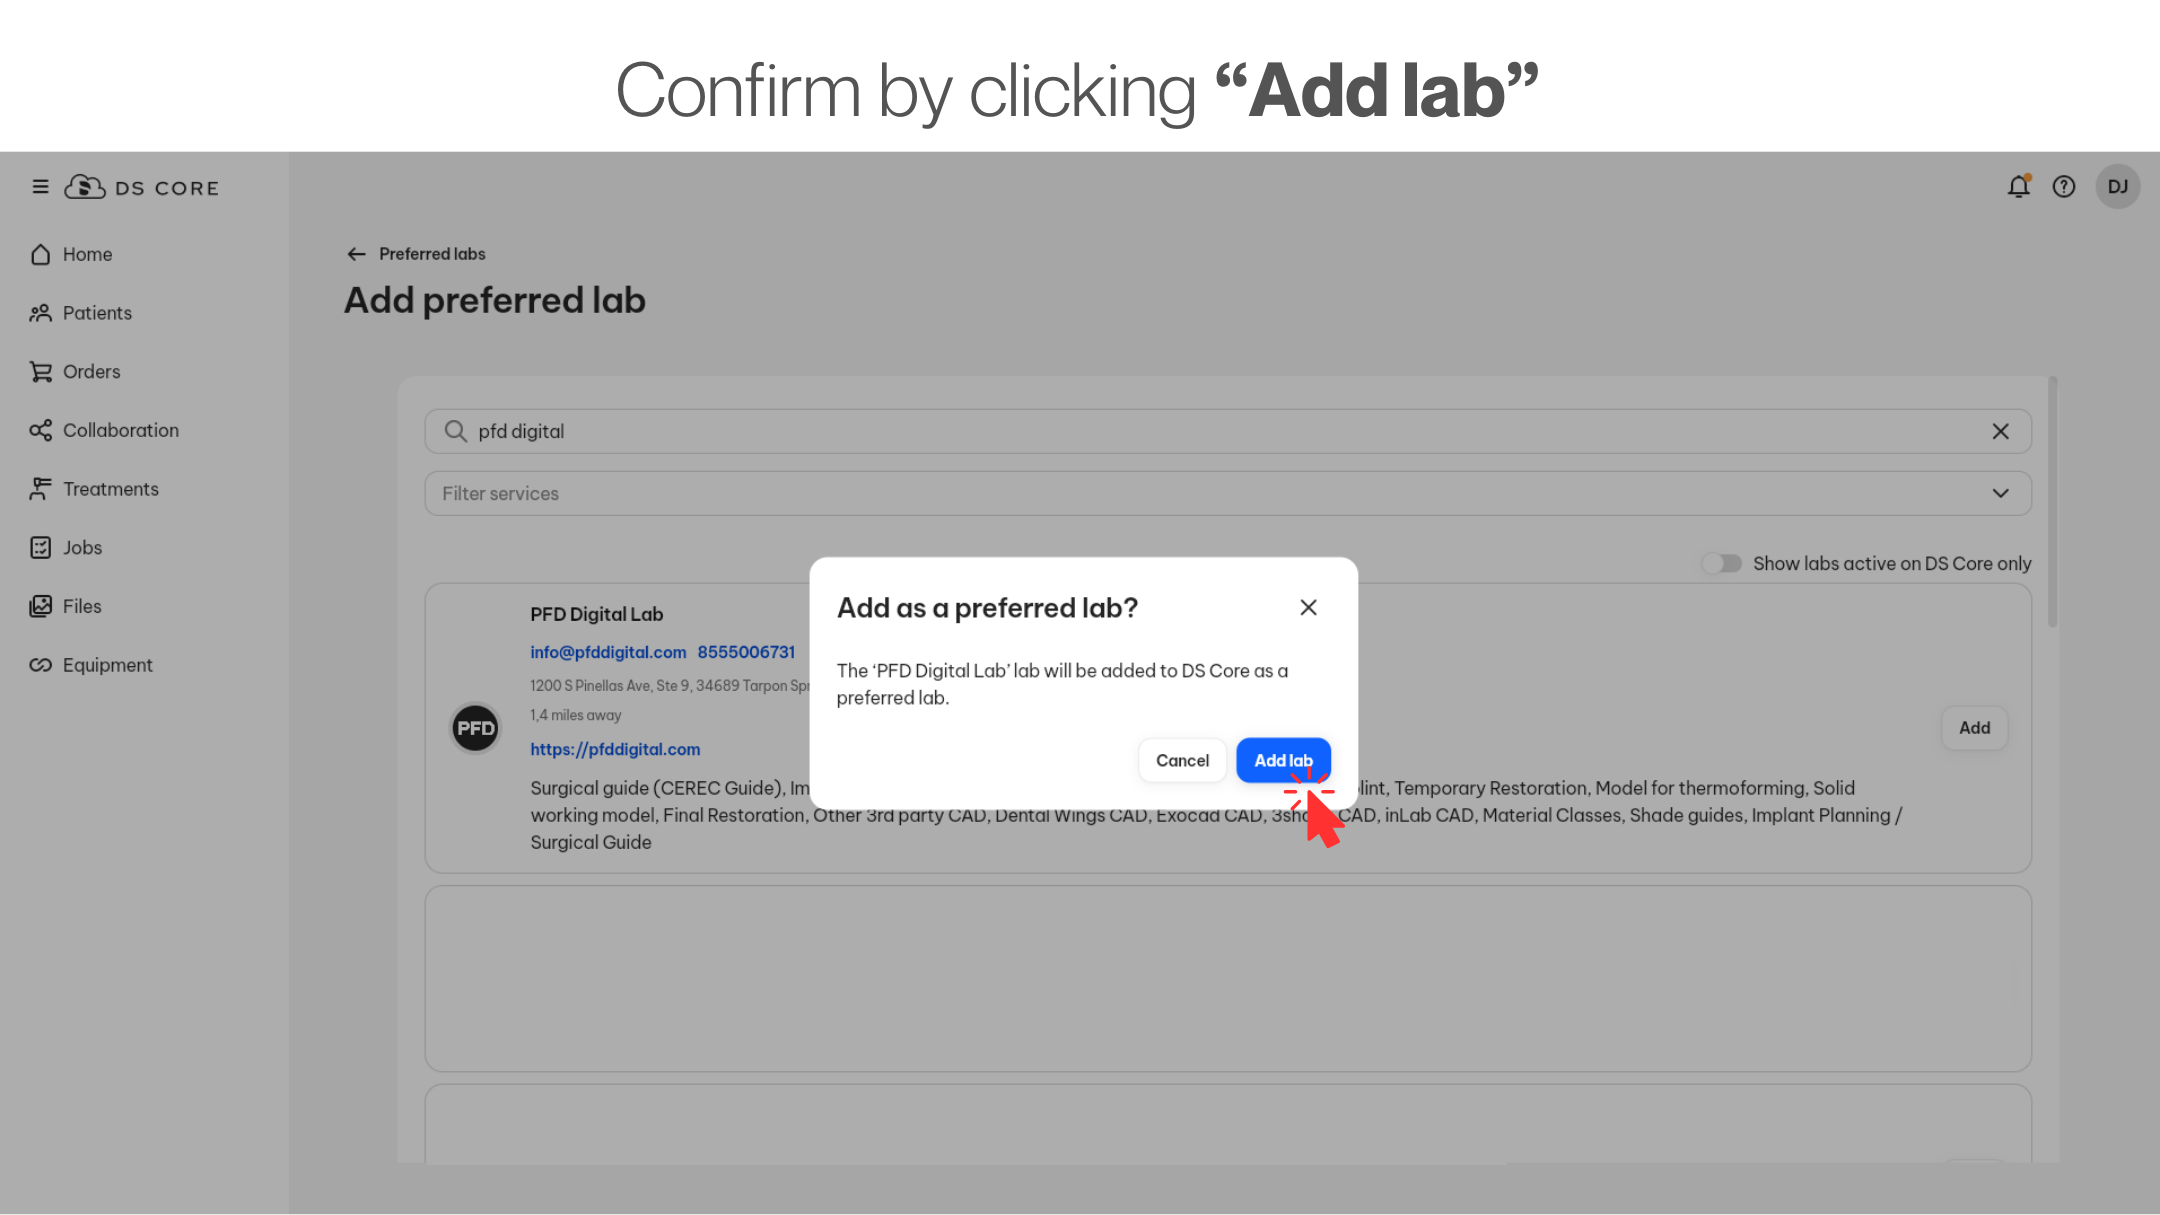
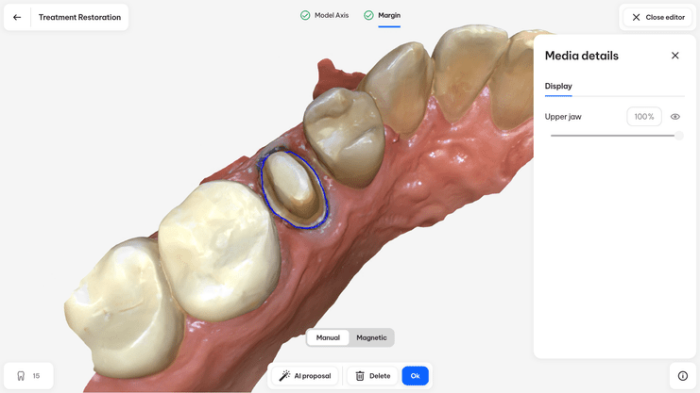
Switch to DS Core Make the move from Connect Case Center to DS Core and unlock faster, smarter, and more secure collaboration with our lab. Get Started - Create an Account Already have a DS Core Account? Add PFD as a Preferred Lab Switching to DS Core Is Easy The switch to DS Core is underway, make sure you’re ready with PFD Digital. Follow these easy steps to keep your digital workflow smooth and uninterrupted. Don’t wait until the last minute — setting up now means less stress and no delays later. New to PFD Digital? Request Our Fee Schedule Here Step 1 In the top right Select “Practice” from the dropdown list Step 2 Select “Preferred Labs” from the options menu Step 3 Click the “+ Add preferred lab” button on the right of the page Step 4 Type “PFD Digital Lab” in the search bar, then click “Add” Step 5 Confirm by clicking “Add lab” Benefits for the Dental Practice Enhanced communication with PFD Digital Lab Use CEREC or Connect Software to scan Keep all your media in the DS Core media library No licenses needed Receive design proposals from PFD Digital Lab and see what we see Add X-rays and other files to your case submission How to Scan & Send Cases With DS Core Step 1 Set up scan case Select a patient, create, and define a Treatment. Click on DI Scan and select the scanner you want to use Step 2 Scan patient Connect SW automatically opens in the acquisition phase.Perform patient scans according to the required scan catalogues for the treatment.Once the model is calculated, the scan is automatically uploaded to DS Core. Step 3 Check model and margin DS Core automatically pre-draws the preparation margins and sets the model axis for your convenience.Confirm these settings or adjust them if necessary. Once finalized, close the editor. Step 4 Send order to lab Click on Order. The details will be filled in accordingly to the Treatment you’ve created.Add further files and comments if needed. Lastly, select PFD Digital Lab and place the order.You can now see the status of your order from the dashboard and use the chat to communicate with your lab. Other Helpful Training Videos DS Core General Features - Status & Treatment Scan In this tutorial you will learn about a status scan and treatment scan with Primescan 2. DS Core General Features - Start an Intra Oral Scan from DS Core In this tutorial you will learn to initiate Intra Oral scans from DS Core. Curious to get started with DS Core. DS Core General Features - Scan with Primescan 2 In this tutorial you will learn about the scan software on DS Core to take intra oral scans with Primescan 2.